Pages

Showing posts with label Design Team Projects. Show all posts

Tuesday, August 21, 2012

Lili of the Valley Christmas Animals Blog Hop

UPDATE: The winners have been announced on the Inspire blog, check HERE to see if you've won. 

Good morning LOTV fans, thanks for stopping by! Today we’re holding a Lili of the Valley sneak peek blog hop to celebrate the launch of some new Christmas Animals and Sentiment stamps! Here's how it's going to work... many of the DT members are going to be participating so all you have to do is 'hop' from blog to blog (links provided below) and leave a comment on each post for a chance to win some great prizes. 

Prize 1- One set of the brand new Christmas sentiment clear stamp sheets, 1 each of the new designs, worth £50.00 (approximately US$78.55).

Prize 2- The full set of the new Christmas animal rubber stamps, worth £45.00 (approximately US$70.70).

The prizes will be 'hidden' in 2 of the blogs, so you have to make sure and leave comments on all of them for the best chance of winning. The lucky blogs will be revealed tonight and two winners will be drawn at random from the comments left on those blogs. 

Now onto my card...

I chose to use 'All Cozy and Warm' for my card today. Remember these stamps will be available for purchase on August 22nd. I've colored these adorable animals with Copics and colored pencils.


The papers I used on this card are from the new 'Classic Christmas' paper pad recently made available in the store. They are wonderful! I especially love the tartan plaids included in this pad, I used the red for this card. I even added some texture to it using a linen impression plate, it almost looks like real fabric! The wood grain paper is not from the paper pad, it's a scrap I had laying on my craft table that just added the perfect 'lodge' Christmas look to the whole card. A pretty bow with some jingle bells and a tag from a new set of Christmas sentiment tags also being released on the 22nd and the card is done! I actually added some of the new papers to the inside of the card too, along with a verse from 'A5 Verses', but I forgot to take a picture of it. 

Anyway, hope you like it, now 'hop' along to the rest of our blogs and don't forget to leave comments on all of them for a chance to win! Thanks for visiting!

Saturday, April 14, 2012

By the River

We're continuing our Boy/Circle theme this month over at the Lili of the Valley Inspire blog, head on over to see more of the card I created this week.


Saturday, March 24, 2012

Easter Sweeties

Good morning everyone! Easter is quickly coming up next month, so I've made up a card using the new Easter Sweeties stamp. I love this adorable image, the sweet little ducks and colorful egg are scrumptious. 


I've used very light, bright Copic colors that I matched up to the papers from Raspberry Road Designs 'Baskets and Bunnies' collection. 


The pretty cherry blossom is a Memory Box die cut that I shaped with an embossing stylus to make it more realistic. I also added a pretty little tulip border along the bottom that I cut on my Silhouette Cameo. I then added pink Liquid Pearls to the flowers. I'm pretty sure the tulip border was a freebie I got from the Sure Cuts A Lot forum. If you haven't checked that forum out yet, you really should. Tons of free SVG files!


Thanks for stopping by!

Stamps: Lili of the Valley
Ink: Adirondack, Distress
Paper: Hammermill (for printed digital papers and stamped image), Bazzill and Core'dinations
Tools & Accessories: Memory Box Cherry Blossom die, Cameo, Copics, Liquid Pearls, PTI ribbon, yellow pearl

Thursday, March 22, 2012

Ride with Me

Good morning! Here's a peek at another new stamp Lili of the Valley is releasing on the 28th. This one is called 'Ride with Me'. I managed to use some purples again, maybe it will grow on me eventually lol. How could I resist when these new papers from Prima 'Meadowlark' are so beautiful? They're actually more of a lavender, which I don't have trouble using, just the darker purples.


Whenever I see these cute little scooters, I immediately think of many countries in Europe. We Americans don't see them too often, just big noisy motorcycles! So I tried to make it look like a French postcard, or something with some of the stamps from Papertrey Ink's 'Postmarks' set. The cancellation mark and sentiment are from LOTV's 'Greetings Postmarks' set. 


The gorgeous lace border is from the Silhouette Store, cut on my Cameo. So much gorgeousness in that place!


Don't mind the little heart charm, I didn't realize it was turned backwards until I was done editing the photo! Ooops.


So what do you all think of the new releases? Any favorites?


Thanks for dropping by!


Stamps: Lili of the Valley, Papertrey Ink
Ink: Memento, Perfect Match, Palette
Paper: Prima, Bazzill, Core'dinations
Tools & Accessories: PTI ribbon, Nestabilities, PTI postage stamp die, sewing machine, Crystal Lacquer, pewter heart charm, silver chain, Silhouette Cameo, unknown corner punch

Tuesday, March 20, 2012

Love Boat

Hello everyone! I've got a sneak peek of some new stamps coming out at Lili of the Valley on March 28th. This one is called 'Love Boat' and I just fell in love with this adorable image. I knew I wanted to do something dramatic with a night sky so I went on the hunt for the perfect patterned paper for the background. I found nothing in my stash (how is that possible?! I have tons of paper!) so I turned to the wonderful world of digital scrapbooking. Literally thousands and thousands of options available on the web, all the patterned paper you could possibly want yet I was having trouble finding just what I wanted. So after hours and hours of scouring the net, I turned to my favorite digital SB store Raspberry Road Designs. I don't know why I just didn't look there first, I could have saved myself half a day! I decided to use one of the papers from the paper pack, Mystical Sky. Absolutely perfect for what I had in mind. 


I had to use a trick from the Black Magic technique to make the willow branches show up on the  dark background so I took a tiny, tiny paintbrush and colored in the leaves and the moon with watered down white acrylic paint. Then after it dried I was able to color those elements in with colored pencils. 
The bears in the boat and the wine bottle were simply colored separately, cut out and glued to the background. 
Then I went to town with the embellishing. Sewed some seed beads around the perimeter of the label die cut as well as some 'stars' in the sky, then went back with a Souffle pen for more stars. 


The sentiment 'postmark' is from LOTV's Set 18 Greetings Postmarks embossed in white. 


Keep your eyes peeled for more sneak peeks on the Inspire Blog, there are some new designs that I am very excited about!


Thanks for visiting!


Stamps: Lili of the Valley
Ink: Versamark, Memento
Paper: Memory Box, SU, Hammermill color copy used for all digital patterned papers from Raspberry Road Designs
Tools & Accessories: Spellbinders Labels, Martha Stewart edge punch, seed beads, Souffle pen, Copics, Stickles, Inkessentials white gel pen, colored pencils, OMS, satin ribbon, Americana acrylic paint, paint brush

Wednesday, March 14, 2012

Gift Card Holder

Good morning blog friends! I received a gift card over the holidays for one of the chain restaurants (can't remember which one right now) and it came in such a nifty little holder I quickly took it apart to try and replicate it. The cut out window on the sleeve was an apple I think, so I changed that on mine, but here's what I came up with...


 Pretty cute, huh? It's amazing what you can come up with if you pay attention to the packaging to the hundreds of items we buy every day! If you find something you like, take it apart and use it as a template to trace onto your own pretty papers. 


I used Born to Shop for this holder, because after all it is for a shopping card. 


This one is basically an outer sleeve with a die cut window, pretty papers and a bow, and an inside matchbook type card with a pocket inside for a gift card. Very simple. I added a little sentiment to the inside from Set 10- A5 Verses.


I really like the way this came out, it's going to be my future packaging for all gift cards from now on. I just hope I saved the original one.... eep


Thanks for stopping by, have a great day!


Stamps: Lili of the Valley- 'Born to Shop' & 'Set 10- A5 Verses'
Ink: Perfect Match
Paper: Papertrey Ink
Tools & Accessories: Copics, Scor Pal, Seam binding, McGill circle punch, EK Success edge punch, Spellbinders Labels 1

Sunday, February 12, 2012

Moving Day

Good morning all! I have another sneak peek of one of the new Lili of the Valley stamps being released on the 20th. This one is called 'Moving Day'. I like that you can find stamps at LOTV appropriate for some of the more obscure occasions in our lives, such as a new home. They have something for everyone!


I colored with Copics, but I did the grass and background coloring with pencils. I keep three shades of green and a Derwent Turquoise Blue within easy reach at all times, I use them on almost all of my cards. 


The sentiment banner is from Papertrey Ink, as are the papers, ribbon and felt flower. 


So have you all seen the other sneaks on the Inspire Blog? What do you think of the new release? I bet your wallets are screaming again, right? ha ha! 


Thanks for stopping by, have a wonderful day.


Stamps: Lili of the Valley 'Moving Day' (2-20-2012), Papertrey Ink
Ink: Memento
Papers: Papertrey Ink, Heavenly White card base, Hammermill
Tools & Accessories: Papertrey Ink ribbon/felt/Bloom Builder die, Copics, pearl brad, pinking rotary cutter

Tuesday, February 7, 2012

Hoppy Easter

Hello Friends! I have a sneak peek of the upcoming Lili of the Valley release coming up in a few weeks. How adorable is this image?! There is no one, and I mean no one who does fuzzy little animals like Lili of the Valley. I can't get enough of them! I wanted these darling little bunnies to be all white with pink ears and noses just like an Easter bunny should be.


I stuck with very light colored Copics (except for the yummy chocolate egg) to coordinate with the papers. These were printed  from a digital collection from Raspberry Road Designs. 


When thinking of what kind of embellishment I could add to the card after it was put together, I didn't want to do the usual flowers but wanted to keep the clean simplicity of the layout. I rummaged through my stash of trims and came across all this pom pom trim I totally forgot about. I added the small pom pom trim to the bottom of the image, but then I noticed the larger white trim looked kind of like.... well-- bunny tails! Ha! I cut two of them off and attached them to some crochet thread and slipped them through the bow. Perfect. 


Hope you like it, thanks for looking!


Stamps: 'Hoppy Easter' coming soon to LOTV store, Happy Circular Sentiments
Ink: Memento
Paper: Memory Box, Digital papers from Raspberry Road Designs printed on Hammermill
Tools & Accessories: Spellbinders Labels, McGill circle punch, pom pom trim, PTI ribbon, Copics, Sharpie poster pen, Souffle pens, EK Success edge punch

Saturday, February 4, 2012

Bunnies in Love

Good morning folks! Today is my day on the Ideas to Inspire Blog, we're showcasing everyone's cards using previously released stamp sets all about love. This one is 'Bunnies in Love'. I loved this stamp when it first came out and I love it just as much now!


Bunnies are colored with Copics. The papers are from a retired Stampin Up collection. 


I made the paper flowers using EK Success flower punches in two sizes. I just shaped them with a shaping tool and added the 'stamens' to the center to resemble cherry blossoms. They're simply tiny strips of paper that I fringed with scissors, rolled up and dipped the ends in yellow acrylic paint. 


Thanks for looking!


Supplies used:

Stamps: LOTV Bunnies in Love, Papertrey Ink sentiment
Ink: SU
Papers: SU, PTI
Tools & Accessories: Copics, Stickles, EK Success flower punches, Martha Stewart leaf punch, EK Success tiny scallop edge punch, SU edge punch, Oval Nestablities, striped twill ribbon, Maya Road heart stick pins, PTI Tiny Tags die, baker's twine, Crystal Lacquer

Wednesday, November 23, 2011

Lili of the Valley Thursday Challenge - Anything Goes

Hello everyone, we've got another challenge going on over at the LOTV blog, this week anything goes! I really took that challenge to heart and went all out with this big ole stocking ornament on my card. It can be removed and hung on the tree for the holidays. 


I added tea dyed pom pom trim, wool felt and a twill bow along with some hand stitching and jingly bells to the stocking die cut. There's a twine loop on top for hanging.


I colored Milly's Winter Window with Distress inks, and tucked the image in by the stocking. Such a pretty little picture, don't you think?
BTW, the colors I used to color and stamp the majority of this card are the new Winter Limited edition Distress inks, aren't they gorgeous!? Such a beautiful color combination. 


For those of us celebrating Thanksgiving, I hope your day is full of wonderful food, family and love! Let's not forget to count our blessings each and every day. I am so thankful for all my fellow stampers who regularly visit me here, I appreciate each and everyone of you!


Have a wonderful Thanksgiving Day!


Stamps: Lili of the Valley, Waltzingmouse, PTI snowflake
Ink: Memento, Distress, Versamark
Paper: PTI, water color paper, SU
Tools & Accessories: Lifestyle Crafts stocking die, PTI rick rack die, pom pom trim, wool felt, twill ribbon, jingle bells, embroidery thread, SU tiny tag punch, baker's twine, Souffle pen, Spica pen, Marvy Uchida Giga snowflake punch, jingle bells, Viva Decor Pearl pen, Martha Stewart snowflake edge punch

Wednesday, November 9, 2011

LOTV Thursday Challenge 'Creature Comforts'

Hello friends, are you gearing up to place your orders for the new stamps from LOTV? Which ones will you be ordering? It's a difficult decision I know!

For our Creature Comforts challenge this week, I went with this adorable critter 'April Showers'. Sometimes these easy-to-color images are great, they are super fast to do. And the matching sentiment is great, no more wasting time digging through my stash trying to find just the right one!

The little kitty is colored with Copics, and I went over the raindrops and the puddle with Crystal Lacquer to make it 'wet' looking. 


What to do you all think of the puffy little rain clouds? I wasn't too sure about these, but I spent so much time sewing them up I couldn't leave them off, lol! They're simply wool felt die cut clouds (die from Papertrey Ink) that I stitched together and stuffed. Then I added little rain drops with clear seed beads dangling from embroidery thread. Guess where that inspiration came from?! Mel Stampz of course....that woman is a genius!


Thanks for stopping by and don't forget to join in the challenge for a chance to win a prize.


Stamps: Lili of the Valley
Ink: Distress
Paper: Hammermill, Bazzill, Cosmo Cricket, Memory Box
Tools & Accessories: EK Success edge punch, wool felt, embroidery floss, PTI ribbon/button, Copics, Crystal Lacquer, seed beads, PTI banner/cloud dies

Saturday, October 29, 2011


I have an easel card posted on the Ideas to Inspire blog, check it out if you haven't visited already!


Thursday, October 27, 2011

Lili of the Valley Thursday Sketch Challenge

Hello everyone! We have a lovely sketch from Bev for this week's challenge. I chose 'Lots of Letters' for my card. The image is so detailed and beautiful I didn't want to do too much in the way of embellishments. I chose to go with a variety of pretty papers and a big red striped bow. 


I colored my image with Copics once again, my poor pencils are feeling neglected, I'm sure. While I'm on the subject of Copics, I've had several requests for a list of colors I've used, but I just don't think I could be that organized. If you could see my work space while I'm coloring furiously, you'd understand why, lol. I have a 1/4 of an oblong kitchen table as my 'studio' and it is NOT pretty. While I'm coloring, there are tons of markers all over my table, some that I actually use to color the particular image I'm working on, some are just pulled out, tested and dropped on the pile because the color is not right. I get into such a 'zone' while coloring, that I'm quite sure I would never remember to write down the colors.


However I will share some tips I find very useful when choosing colors to use. #1- It is essential to have a hand colored chart of all your colors. Whether it's the official Copic one, or your own chart, this is an important tool. I keep my chart right next to me whenever I'm coloring, and refer to it often. 
#2- I choose which paper I am going to use before I start coloring. This makes choosing colors so much easier. The talented patterned paper designers have done all the hard work for you and chosen coordinating colors. Now all you have to do it pick out three or four of the dominant colors in your papers, and match them to your Copic color chart. For example, these papers had an orange y-red, a teal blue, a leaf green and a vanilla as the dominant colors. I looked at my chart and found the four markers that best matched these colors. 


I picked some lights and darks from the same color families, and with these colors I can color the majority of my image. For skin tones, I almost always use E0000, E00 and E11. I blush the cheeks with R01 and R02. For snow and white fur I usually use BG0000 or BG70, with a little BV00 for added shadows. Shoes are usually brown or black or shades of grey. That's all there is to it. I rarely keep track of color combos I use regularly except for the ones I've already mentioned for skin, snow and white fur. 
Finally, If I find the shading is not quite as deep as I'd like it, for the red hats and coats for example, I'll go back after I'm all done with Copics and darken the shading with colored pencil. In this case I used a Black Raspberry Prismacolor pencil.
So if you can match colors fairly well, choosing which colors to use for your image should not be too much trouble at all. Just make sure to practice, practice and practice some more! Every time you mess up, you will have learned from your mistake and the next time will be better, I promise you!


I hope these tips have been a bit helpful, it's the best I can offer.


Thanks for all your lovely comments, I so appreciate them, have a wonderful day!


Stamps: Lili of the Valley, Basic Grey 
Ink: Memento, Versafine, SU
Paper: Hammermill, Bo Bunny, Stardream
Tools & Accessories: EK Success tiny scallop edge punch, Nestabilities, SU ribbon, Copics, Stickles, Wild Orchid Crafts pearls

Wednesday, October 12, 2011

Lili of the Valley Thursday Challenge 'Warm and Cozy'

Hello folks! It's time for our Thursday challenge again, our theme is all things warm and cozy. If you haven't read it already on the LOTV blog, the challenge DT has been split in two. Team A will participate in one week's challenge, Team B will do the next and so on. Makes things a lot easier I think.
Anyway, I dug through last year's Christmas release for this beauty, 'Mary and Joseph'. The little baby Jesus is all warm and cozy in his loving mother's arms.


I've been wanting to do an LOTV image on Kraft for a while, gives it a totally different look don't you think? The light brown gives the whole thing a very warm feel. I used a combination of Copics, then went back with my colored pencils to deepen the shadows. These two mediums work very well together, I've discovered. As long as you remember to color with Copics FIRST! If you do not, you will ruin your marker! 


Thanks for taking a peek, have a great day!
Stamps: Lili of the Valley
Ink: Memento, Versamark
Paper: PTI, My Mind's eye, SU
Tools & Accessories: silk ribbon, snowflake charm, Swarovski crystal, beads, Copics, colored pencils, Stickles, Spellbinders Labels, McGill circle punch, Vanilla embossing powder

Wednesday, September 28, 2011

Lili of the Valley Thursday Challenge 'Button it!'

Hello everyone, here we are with another Thursday challenge for LOTV. Our theme this week is to use buttons on our projects. No problem-oh! I love using buttons, and use them frequently. Here's what I came up with...


I decided to make a cute little wool felt tree with buttons for the Christmas 'balls'. I simply cut out two triangles from felt, stitched them together, and added some pom pom trim and button embellishments.
I used the Kitty Gifts stamp, colored with my colored pencils. 


The snowflake was a last minute addition when I discovered it already made in my old discarded embellishments box. Perfect!I knew there was a reason I saved all that stuff that never ended up on a card! LOL. 


Feeling inspired to use those buttons? Create your own card using a LOTV stamp, then enter it for a chance to win some cool prizes on the LOTV blog. I can't wait to see what you all come up with.


Thanks for stopping by!


Stamps: Lili of the Valley
Ink: Memento, Distress
Paper: Heavenly White, Neenah, Stardream, Karen Foster, SU
Tools & Accessories: Wool felt, PTI buttons, gingham ribbon, EK Success tiny scallop punch, Cuttlebug Snowflake die, Martha Stewart snowflake & branch punches, Glass Glitter, colored pencils, OMS, pom pom trim, Glimmer Mist, embroidery thread, SU scallop edge punch

Wednesday, September 21, 2011

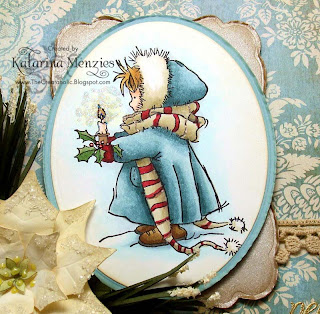
Light a Candle

Hello fellow Lili of the Valley fans! It's time for our Thursday challenge. This week we are using Aqua, white and glitter. No problem for me, I love Aqua. Blue greens are my favorite spots on the color wheel, dark or light! 
Here's what I came up with. Since I love Aqua, I went with my all time favorite LOTV design, 'Christmas Candle'. Out of all the absolutely beautiful stamps, this is the one


I chose to use this gorgeous vintage damask digital paper from Scrap Girls, 'Holiday Time' kit. So pretty! The adorable little girl was colored in darker blue green Copics.


I'm still waiting for the perfect Poinsettia die (hurry up Spellbinders, I'm dying here! lol) So until then, I was on a long quest for a cut file for my Gazelle. I tried TONS of them, but they just didn't look very realistic to me. I now have a pile of rejected Poinsettias on my craft table. Here's what I eventually did...
I had an old PDF for a crepe paper Poinsettia from Martha Stewart on my computer. I had made it once before, but you have to cut out almost 20 of them by hand in various sizes. Too much work. So I converted the file for my cutter and in minutes they were all cut out. The long part of this project was shaping each petal. But so worth it, right? I love the way it came out! Cover the edges in Glass Glitter and added yellow 'pearls' to the center with a Viva Decor pen. 


The pine sprigs were cut on my Gazelle too, I am so happy I finally got one of these, saves so much time!


Thanks for dropping by!


Thursday, September 15, 2011

Impression Obsession Fall Challenge

Good morning everyone, it's time for an Impression Obsession challenge. We're celebrating fall this week. Lots of fun fall themed stamps from IO, just hard to choose which one! I went with this adorable little guy, 'Boy in Leaf Pile'. Coloring the leaves was a lot of fun, I used my Copics.  I scribbled a lot of different colors onto a piece of acetate and just dipped YR21 into each one. This way I was able to get a lot of color variation very quickly. 


I used the Gingham Cover-a-card stamp for the card base. I don't have too many fall themed papers, and no gingham papers at all, so this type of a BG stamp is a must. I can create any color in a matter of minutes. I always use a brayer to apply ink to the CAC stamps, I find I get smoother, even color. 


A cute fall sentiment completes the card. (Happy Fall)


Now head on over to the IO blog for more fall inspiration from the rest of the design team, then you can create your own card and enter for a chance to win some IO bucks.


Thanks for visiting!


Wednesday, September 14, 2011

Lili of the Valley Thursday Challenge Red, White and Green

Hello folks, time for another Lili of the Valley challenge. This week we're challenged to use the colors red, green and white on our cards. I really wanted to try to use the colors for any card except for Christmas, but I just couldn't get it to work. A Christmas card is what I settled on. 


I colored the image with Copics, and used lots of snowflakes to embellish the snowy scene. 


I love using this diagonal striped twill ribbon, in this red color it looks like peppermint candy! A few mini jingle bells and my red, white and green card is complete.


Thanks for stopping by!


Stamps: Lili of the Valley Christmas Bears Sledge and Christmas Circular Sentiments
Ink: Memento
Paper: Bo Bunny 'Blitzen', Stardream, Hammermill, Heavenly White card base
Tools & Accessories: SU Northern Frost die, twill ribbon, bells, Copics, Stickles, Martha Stewart edge punch, Sakura Glaze/Souffle pens, McGill circle punch

Thursday, September 8, 2011

Lili of the Valley Missing You Challenge

Good morning everyone! We're getting drenched with rain again. It's been 48 hours of non stop rain and it's getting to me. Fortunately, I get to stay home today, so it won't be too bad. 

Our challenge this week is to make a Missing you card. I went through all the LOTV stamps I had trying to decide which one to use when I came across this furry cutie, 'Messy Messages'. She just looked perfect, holding up her piece of paper ready for me to stamp any message I want on it. I used PTI's alphabet set to stamp the sentiment on it. 


I wanted really bright, cheerful colors and settled on this polka dot and stripe from My Mind's Eye. I added a matching flower cut from wool felt using a PTI die. 


This is actually a tiny card for me, A2 size. I'm so used to making giant 6" squares that when I make a smaller one like this, they seem dwarfed! I should try to make 4" squares cards, or even 3"! That would be adorable!


Well, thanks for swinging by, have a great day everyone!
Stamps: Lili of the Valley, Papertrey Ink, Whimsey Stamps postmark stamp
Ink: Memento
Paper: PTI, Memory Box, MME
Tools & Accessories: PTI flower die & button, Copics, Stickles, PTI ribbon, SU scallop punch

Friday, September 2, 2011

Festive Fairy

Good morning blog friends! I have another peek of one of the new stamps Lilli of the Valley is releasing soon. This one is called Festive Fairy and she is a beauty. (aren't they all!


She's colored with Copics to match these gorgeous papers from an older Stampin Up collection. I added lots of sparkle with Stickles to all the snow. 


The rose is from Wild Orchid Crafts. I didn't have a red one, so I sprayed a white rose with Red Velvet Glimmer Mist. There's only one problem when I do this though, the glue doesn't hold and it falls apart. Not really a big problem, I just glue them back together after it dries. You can always make do with what you have with a little ingenuity! I've also colored them with daubers dipped in ink pads, which works a little better because they don't get saturated. The color isn't as vibrant though. 


So which new images are your favorites from the upcoming release? Have you all been seeing the DT's gorgeous creations with them? I'm glad they're being released well in advance of the holidays, gives me plenty of time to get a head start on my Christmas cards. 


Thanks for stopping by!

Stamps: Lili of the Valley 'Festive Fairy', sentiment from 'Merry Christmas' A5 stamp sheet
Ink: Memento, Distress
Paper: Heavenly White, SU, The Paper Co., PTI, Hammermill
Tools & Accessories: Spellbinders Lacy squares, SU twill ribbon, WOC rose, Glimmer Mist, Martha Stewart snowflake punch, Copics, Stickles, EK Success tiny scallop punch, McGill decorative label punch